Writing Sphinx Documentation
Overview
This is a directory of links to information and hints you need when you want to write (software) documentation using reStructuredText and Sphinx. Using them should improve your experience as an author as well as the end result for your readers.
Sphinx is a tool that makes it easy to create intelligent and beautiful documentation, and uses reStructuredText as its markup language. It was originally created for the new Python documentation, and thus has excellent facilities documenting Python projects, but is in no way limited to those.
Also visit Write the Docs, which is a place with high quality information about the art of writing documentation.
When to Use Sphinx?
Using Sphinx has several advantages over other options for writing documentation that has strong ties to the source code. It can be maintained and versioned together with the source, which increases the likelihood that you end up with current and correct documentation.
Sphinx was designed for that purpose – to write extensive ‘prosa’ documentation in addition to any in-source markup most languages offer (e.g. Javadoc), and shines when it comes to cross-linking within the documentation and into source code – for example, it’s easy to refer to identifiers in your source by their name.
For a Python project, Sphinx is the obvious choice, but there are also extensions for Java and other languages (so-called domains). The generated output can be styled freely, and the Sphinx eco-system offers lots of documentation and code highlighting themes.
Feature Highlights
- Output formats – HTML (including Windows HTML Help), LaTeX (for printable PDF versions), Texinfo, manual pages, plain text.
- Extensive cross-references – Semantic markup and automatic links for functions, classes, citations, glossary terms and similar pieces of information.
- Hierarchical structure – Easy definition of a document tree, with automatic links to siblings, parents and children.
- Automatic indices – General index as well as a language-specific module indices.
- Code handling – Automatic highlighting using the Pygments highlighter.
- Extensions – Automatic testing of code snippets, inclusion of docstrings from Python modules (API docs), and more.
Introduction & Cheatsheets
- See the How-Tos section below for some quickstart advice.
- Sphinx reStructuredText primer – A brief introduction to reStructuredText (reST) concepts and syntax.
- Beautiful Docs – A collection of exemplary open source project documentation.
- Style guide for Sphinx-based documentations
Extensions & Tools
There are a lot of extensions, styles, themes, and so on available on the web. For example, see the reStructuredText tool support entry on Stack Overflow, or the Awesome Sphinx bookmark list on GitHub.
You should get a reStructuredText language definition enabling syntax
highlighting in your favourite editor or IDE, see below for gedit3 support.
Extensions
- PlantUML for Sphinx allows you to add PlantUML diagrams to your documentation.
- sphinxcontrib-programoutput inserts the output of arbitrary commands into documents, helping you to keep your command examples up to date.
Tools
- restview – A HTML viewer for reStructuredText documents that renders them on the fly.
gedit3
- reStructuredText preview and highlighting
- gedit3 language definition for reStructuredText
How-Tos
Sphinx Installation and Setup
See Installing Python Software for the full story and all details, this is how to install Sphinx to your user account on a properly configured POSIX system (including Babun or CygWin):
venv=~/.local/venvs/sphinx
mkdir -p $(dirname $venv)
python3 -m venv $venv
$venv/bin/pip install -U pip
$venv/bin/pip install sphinx sphinx-autobuild
ln -nfs -t ~/.local/bin $venv/bin/sphinx-*
For a Python project, it makes sense to add Sphinx to the development requirements of the project, and install it to the project’s virtualenv together with other tools. This makes you independent of the machine you build on, and also ensures that you always get the same version of Sphinx.
# Development requirements
Sphinx==2.2.2
sphinx-autobuild==0.7.1
sphinx-rtd-theme==0.4.2
Creating a Minimal Project
In your project directory, call sphinx-quickstart which will prompt
you for required information. Answer the first question for a ‘root
path’ with docs, and the others according to your project’s needs.
You will then find a working minimal Sphinx project in the docs folder
– git add that immediately, before you build your documentation the first time.
To build a HTML rendering, go into docs and call make html. If
all goes well, you’ll find the root page of your documentation at
docs/_build/html/index.html or docs/_build/index.html
(with newer versions of Sphinx) – just open it with your browser.
If you use the current Sphinx version, the default theme is ‘Alabaster’.
Let’s change that to the default theme used on Read the Docs, in docs/conf.py:
html_theme = 'sphinx_rtd_theme'
Call make html again and reload the page in your browser. You should
see a difference.
Adding a New Chapter
To add a new chapter in its own file, create a file like
docs/chapter.rst with the following content:
##############
My New Chapter
##############
Then add that file to the toctree of your index.rst file:
.. toctree::
   :maxdepth: 2

   chapter
Entries in a toctree are just filenames, but relative to the
containing file, and without extension, so we end up with just
chapter here.
Rebuild the docs and “My New Chapter” will be added to the sidebar.
See Sections in the Sphinx documentation regarding the markup for different heading levels.
Publishing Your Document
If you want to publish documentation for a project on GitHub, the easiest solution is Read the Docs (RTD), which is a hosting service that builds your Sphinx documentation on-the-fly based on commit triggers. That means you don’t have to generate and upload anything, just commit any changes and they’ll be published soon thereafter.
RTD also knows about versions (as long as you maintain them properly) and thus offers both the latest documentation from source as well as previously released versions. As with all these services, you log in with OAuth2 and just click on your project repository to activate building – it’s very easy.
Automatic Preview
The best preview solution is
sphinx-autobuild,
which is a drop-in replacement for the sphine-build command.
It starts a web-server bound to localhost that makes the
documentation available, and also a watchdog that triggers a build as
soon as you save any changes in your editor. Since only the part of the
documentation that actually changed is rebuilt, this is usually very
quick and you get a near-instant live-reload in your browser view via a
Websocket connection.
If you use the rituals automation tasks library,
starting sphinx-autobuild is as easy as…
invoke docs --watchdog --browse
This launches the daemon and waits for a complete startup, then opens a
browser tab with the rendered documentation.
Try to touch docs/index.rst and watch the activity indicator in your
browser – or take a look into the docs/watchdog.log file.
Converting from Markdown to reST
If you have existing Markdown files you want to integrate into your
documentation, the pandoc tool provides an easy way to convert into
reST-style markup. To make it available on Debian-type system, just
install the package of the same name.
Then a conversion can be done as follows:
pandoc --from markdown --to rst -o "‹file›.rst" "‹file›.md"
Adding a Custom Pygments Lexer to Sphinx
In order for Sphinx to load and recognize a custom lexer, two things are needed:
- Add the package name of the lexer to the
extensionslist inconf.py. Of course, that package has to be importable, either by using a virtualenv or manipulatingsys.path.- Give your lexer package a Setuptools
pygments.lexersentry point.
Then use it in a code-block as if it were a built-in. That’s all.
Automatic Click CLI References
If you implement CLI tools using the Click framework, you can generate a reference as part of your Sphinx documentaton using the sphinx-click extension, covering all the command line options and arguments.
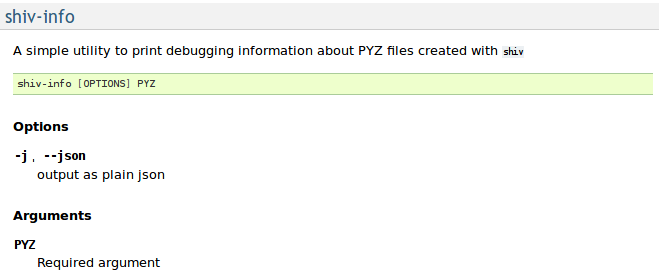
Example Rendering Generated by sphinx-click
The generated text is based on the information contained in the
--help output, just formatted more prettily. Unlike manually
written docs, it’s always up to date by definition. All you need to do
is adding sphinx-click to your requirements and the Sphinx
configuration, and then create a new document file looking like this:
**********************
Complete CLI Reference
**********************

This is a full reference of the :command:`foobar` command,
with the same information as you get from using :option:`--help`.
It is generated from source code and thus always up to date.
See :doc:`usage` for a more detailed description.

.. contents:: Available Commands
   :local:

.. click:: foobar.__main__:cli
   :prog: foobar
   :show-nested:
Add the new chapter to your toc-tree in docs/index.rst.
Then there are only a few more changes needed in your project setup.
docs/conf.py
…
extensions = [
    …
    'sphinx_click.ext',
]
…
docs/requirements.txt
# Requirements to build docs on RTD
sphinx-click